Showing posts with label DIY. Show all posts

Wednesday, March 13, 2013

DIY Cannoli

When I found out how easy homemade mascarpone was, I knew I had to try my hand at cannoli.  I found a recipe on www.foodnetwork.com and adapted it.  Here is the link to the original recipe:

I am giving you step by step photo instructions here, but if you scroll to the end of the post, I have a printer-friendly version of the recipe.  Just highlight and click "print selection."

Preparation
Make (or buy) cannoli tubes.  You need metal or wooden tubes to fry your cannoli.  My husband cut the bottom out of a disposable casserole dish.  As you can see, we were able to make two tubes from the one pan.
 Take a broom handle and wrap the metal tightly around it.  Temporarily tape in place with masking tape.
Slip the tube off the handle (you may have to unscrew the end off the broom).  Staple each end of the tube, then remove the tape.  Voila, two complete cannoli tubes.  You can make as many as you like, though you will probably only be frying 2-4 at a time.


Shell Instructions
Step 1: Whisk together 2 cups all-purpose flour, 1 Tbsp granulated sugar, and 1/4 tsp salt.
Step 2: Cut 2 Tbsp unsalted butter into small pieces.  Using your fingers, work the butter into the flour mixture until it makes coarse crumbs.
 Step 3: Separate one egg.  Set the white aside and add the yolk to the flour mixture.
Add either 1/2 cup of dry white wine or 1/2 c water plus 1 Tbsp rice vinegar.  Mix until you have a smooth dough.
 Step 4: Wrap the dough with plastic wrap and flatten slightly. Refrigerate until you have finished the filling.


Filling Instructions
Step 1: Combine 12 oz mascarpone cheese (I used all that my homemade recipe yielded), 3/4 c powdered sugar, 1 tsp ground cinnamon, and 1/4 tsp allspice.
 Step 2: Beat 1/4 c heavy whipping cream until fairly stiff.
 Gently fold whipping cream into cheese mixture.
 Step 3: Zest one lemon.
 Add lemon zest to cheese mixture.
Step 4: Add 1/4 c mini semisweet chocolate chips to the cheese mixture.  Stir gently to combine.  Cover with plastic wrap and refrigerate until you have finished making the shells.

Frying the Shells
Step 1:  Heat one quart of oil (I used peanut oil) to 360 degrees F. (Watch the temperature so it doesn't become too hot.)
Roll half the dough on a lightly floured surface as thinly as possible.  It needs to be as close to paper thin as you can manage because it will puff up as it fries.  Use a circle jar, bowl, lid, etc. to cut your shells.  (As you can see, my husband bought a container of mascarpone to compare ours to because he wasn't convinced it was supposed to taste the way it does.  It did.  : )
Cut and reroll until you have all the circles cut out.  If you have someone helping you, you can do this while you have someone else frying the ones you have already finished.
Step 2: Make an egg wash using the white you saved earlier and about a tablespoon of water.  Take one of the circles and roll it out a little more.  (They tend to shrink up after you cut them, so you need to reroll to keep them very thin.)  Roll the circle around the tube.  Use your finger to rub some egg wash onto the part of the circle that will overlap.  Finish rolling and press to seal.  Flute the edges slightly to allow the oil to penetrate the tube.
Step 3: Place up to four tubes in the hot oil (as many as your skillet can handle).
Once the tubes have become golden brown, flip them over to cook the other side.  After it has finished cooking, carefully lift the tube from the oil using tongs.  Slip the shell off using a kitchen towel.  Let it drain on paper towels.
Finishing the Cannoli
Step 1: Fill a pastry bag (or large, sturdy ziplock bag) with the filling mixture.  Cut a large hole in the end of the bag.  Pipe the filling into the cannoli.  Only fill the cannoli you plan to eat immediately.  Save any leftover filling in the refrigerator.  Extra shells can be saved in a ziplock bag.  If you want to crisp up the leftover shells, you can stick them in the toaster oven for a little while, then let them cool before filling.
Step 2: Dust with powdered sugar and ENJOY!!!  This is probably the best dessert I have ever made.  No, this IS the best dessert I have ever made, hands down.

Printer-Friendly Recipe:

DIY Cannoli

Equipment
2-4 cannoli tubes or 1-2 foil casserole pans to make them (I buy mine in bulk for cheap)
Masking tape and staples (if making your own tubes)

Ingredients
Shells:
2 c all-purpose flour
1 Tbsp granulated sugar (use cane to ensure non-GMO)
1/4 tsp salt
2 Tbsp unsalted butter, cut into small pieces
1 egg separated (save white for later)
1/2 c dry white wine, or substitute water + 1 Tbsp rice vinegar (add the vinegar to your measuring cup first, then fill with water to reach 1/2 cup)

Filling:
12 oz mascarpone cheese
3/4 c powdered sugar
1 tsp ground cinnamon
1/4 tsp allspice
1/4 c heavy cream (use organic if possible to ensure non-GMO)
1/4 c mini semisweet chocolate chips
1 lemon
1 quart oil for frying (NOT canola or other GMO oils; I used peanut oil)
Flour, for rolling
Egg white (left over from separated egg used in shell)
Powdered sugar, for dusting

Shell Instructions
1. Whisk together 2 cups all-purpose flour, 1 Tbsp granulated sugar, and 1/4 tsp salt.2. Cut 2 Tbsp unsalted butter into small pieces.  Using your fingers, work the butter into the flour mixture until it makes coarse crumbs.
3. Separate one egg.  Set the white aside and add the yolk to the flour mixture. Add either 1/2 cup of dry white wine or 1/2 c water plus 1 Tbsp rice vinegar.  Mix until you have a smooth dough.
4. Wrap the dough with plastic wrap and flatten slightly. Refrigerate until you have finished the filling.

Filling Instructions
1. Combine 12 oz mascarpone cheese (I used all that my homemade recipe yielded), 3/4 c powdered sugar, 1 tsp ground cinnamon, and 1/4 tsp allspice.
2. Beat 1/4 c heavy whipping cream until fairly stiff. Gently fold whipping cream into cheese mixture.
3.  Zest one lemon. Add lemon zest to cheese mixture.
4.  Add 1/4 c mini semisweet chocolate chips to the cheese mixture.  Stir gently to combine.  Cover with plastic wrap and refrigerate until you have finished making the shells.

Frying the Shells
1. Heat one quart of oil (I used peanut oil) to 360 degrees F. (Watch the temperature so it doesn't become too hot.)  Roll half the dough on a lightly floured surface as thinly as possible.  It needs to be as close to paper thin as you can manage because it will puff up as it fries.  Use a circle jar, bowl, lid, etc. to cut your shells. Cut and reroll until you have all the circles cut out.  If you have someone helping you, you can do this while you have someone else frying the ones you have already finished.
2.  Make an egg wash using the white you saved earlier and about a tablespoon of water.  Take one of the circles and roll it out a little more.  (They tend to shrink up after you cut them, so you need to reroll to keep them very thin.)  Roll the circle around the tube.  Use your finger to rub some egg wash onto the part of the circle that will overlap.  Finish rolling and press to seal.  Flute the edges slightly to allow the oil to penetrate the tube.
3.  Place up to four tubes in the hot oil (as many as your skillet can handle). Once the tubes have become golden brown, flip them over to cook the other side.  After it has finished cooking, carefully lift the tube from the oil using tongs.  Slip the shell off using a kitchen towel.  Let it drain on paper towels.

Finishing the Cannoli
1. Fill a pastry bag (or large, sturdy ziplock bag) with the filling mixture.  Cut a large hole in the end of the bag.  Pipe the filling into the cannoli.  Only fill the cannoli you plan to eat immediately.  Save any leftover filling in the refrigerator.  Extra shells can be saved in a ziplock bag.  If you want to crisp up the leftover shells, you can stick them in the toaster oven for a little while, then let them cool before filling.
2.  Dust with powdered sugar and ENJOY!!!

Friday, March 1, 2013

DIY Mascarpone Cheese: SUPER EASY!


If you're like me and love to make things yourself, you have probably at least CONSIDERED making your own cheese.  But to be honest, until now, I've been very nervous because I thought it must be too difficult, require too many ingredients and pieces of equipment that I don't have...  But it turns out there are some very easy dairy products you can make yourself with ingredients and equipment you already have in your kitchen!  This is my first time making my own cheese, so I started with something super simple: mascarpone.  Not familiar with  it?  Have you ever had cannoli or tiramisu?  This is the cheese you use to make them.  You can also use it in place of cream cheese to make cheesecake.

Let me show you the three easy steps to making your own mascarpone...

Step 1: Pour four cups (one quart) of whipping cream into the top of a double boiler.  Don't have a double boiler?  Find a large bowl (glass or metal) to sit over a pot of boiling water.

 
 Heat the cream to 190 degrees F.  Use a candy thermometer to check the temperature.

Step 2: Remove double boiler/bowl from pot and whisk in two tablespoons of lemon juice. Stir constantly for 30 seconds, then continue to stir occasionally for the next five minutes.  The cream should be starting to thicken.

Step 3: Fold a piece of cheesecloth in quarters and lay it in a strainer over a bowl.  Pour the cream into the cloth.  You can let it drain like this, or hang it like this:


 Once most of the whey has separated (can take 1-3 hours), you have finished mascarpone cheese!


Now you're ready to make any number of Italian desserts.  Mmmm....  You can also eat it on toast or a bagel.  It's basically a lightly sweet cream cheese.  Save your whey to add to smoothies or other recipes for added protein.

Cost comparison:
I used fresh, local organic whipping cream, which cost me $10 for 1/2 gallon.  That's basically the same price as regular whipping cream in the grocery store.  Half of that is $5.  The lemon juice was so little it was basically free, unless you use a fresh lemon, then I guess it could cost up to $0.30.

Homemade mascarpone: $5.30 for about 13 ounces of cheese, or $0.41/ounce
Storebought mascarpone: $4.39 (Publix) for 8 ounces, or $0.55/ounce

So not only is this cheaper to make yourself, it is fresh, local and organic!  There is no comparison.

Printable Recipe (Just highlight and click "print selection" in the printer menu.)

DIY Mascarpone Cheese
Ingredients:
4 cups (one quart) heavy whipping cream
2 Tbsp lemon juice

Equipment:
Double boiler or bowl and pot
Candy thermometer
Cheesecloth or butter muslin

1. Pour four cups (one quart) of whipping cream into the top of a double boiler.  Don't have a double boiler?  Find a large bowl (glass or metal) to sit over a pot of boiling water.  Heat the cream to 190 degrees F.  Use a candy thermometer to check the temperature.

2.  Remove double boiler/bowl from pot and whisk in two tablespoons of lemon juice. Stir constantly for 30 seconds, then continue to stir occasionally for the next five minutes.  The cream should be starting to thicken.

3.  Fold a piece of cheesecloth in quarters and lay it in a strainer over a bowl.  Pour the cream into the cloth.  You can let it drain like this, or hang it over a bowl.  Once most of the whey has separated (can take 1-3 hours), you have finished mascarpone cheese!

Wednesday, February 27, 2013

DIY Egg McMuffins

 Ahh, Egg McMuffins.  I like how they aren't as greasy as biscuits or croissants, so I am often tempted to get one.  Until now.  These DIY Egg McMuffins are so much healthier and fresher, and even better, CONVENIENT!  You don't even have to get in your car.  With make ahead eggs, you can't beat them.

Step 1: Grease a muffin tin and crack the desired number of eggs in each cup.  If you don't like eating a whole yolk, break it up a little with a fork.  Season with salt and pepper (and anything else you like - herbs, etc.).

Step 2: Bake eggs at 350 degrees for 15-20 minutes, according to how done you like your yolks.  I did mine for 18 minutes and the yolks were very much done.  I think next time I will do them a little less.  The eggs slide right out of the pan.

Easy peasy, right?

Step 3: Assemble your muffin.  I use whole wheat muffins, split in half and put one egg on each.  That way I get twice the protein with only one muffin for carbs. You can add cheese, meat, whatever you like.  Toast on foil so the cheese doesn't melt down into your toaster oven.

Enjoy!!

What to do with those leftover eggs?  I keep mine in the fridge for quick breakfasts on the go, or you could even freeze them.  Just thaw in the fridge the night before.  If you like, you could even assemble the entire breakfast sandwich and freeze individually.  My kids love the eggs because they love boiled eggs and these taste just like them.  We also love them on salads.  The possibilities are endless.

Nutrition Comparison:
Egg McMuffin (no meat) vs DIY Egg McMuffin (one egg on whole wheat English Muffin with 0.3 oz cheddar cheese):
Calories: 280 vs. 224
Calories from Fat: 108 (39%) vs. 79.2 (35%)
Total Fat: 12 g (Sat Fat: 4.5 g) vs. 8.8 g (Sat Fat: 3.8 g)
Cholesterol: 225 mg vs. 219.9 mg
Sodium: 640 mg vs. 342.7 mg
Total Carbohydrate: 29 g (Dietary Fiber: 2 g) vs. 23.7 g (Dietary Fiber: 3 g)

Cost Comparison:
Egg McMuffin (no meat): $2
DIY Egg McMuffin (no meat): $0.75
     *Muffin: $0.50 (buy them on sale and get them for $0.25!)
     *Egg: $0.17 (organic free range would be $0.29)
     *Cheese: $0.08

Wednesday, February 20, 2013

Getting Back to Homesteading

I have missed writing the last several months!  I have taken pictures of several projects, but have not had the time to post thanks to loads of holiday busyness and more sickness than I care to remember.  Now I am going to let you in on what has been happening lately in my home.

The GMO Transformation
A few weeks ago, my sister-in-law sent me a link to a video that was temporarily available for free.  It explains the dangers of GMOs (Genetically Modified Organisms).  While the IDEA of something being genetically altered had always bothered me, I knew very little about the research that had been done.  Let me just say, you HAVE to watch this video if you have time.  While some of the claims are merely speculative because research just isn't available, many dangers are VERY real and VERY frightening.  Here is the link to the free video:

http://www.responsibletechnology.org/posts/genetic-roulette-free-screening-vote-today/

If that doesn't work for you, try this.  It does cost a little to rent, but it is well worth it.

http://geneticroulettemovie.com/

Baking Up a Storm
So what does this have to do with homesteading?  Well, thanks to this video and other research I have now done on the topic, I am anxious to remove GMOs from my family's diet.  That means removing pretty much ALL corn, soy, beet sugar (ambiguously labeled "sugar" in most foods) and cottonseed that is non-organic. DO YOU HAVE ANY IDEA HOW DIFFICULT THAT IS???  Well, it's hard.  Corn and soy are in everything!  So, I have been drastically attempting to go back to the homesteading ways I had before we moved last year.  I started making my own bread again from my fresh ground wheat.  Here is the recipe I used.  (More to follow in another post.)

http://thehappyhousewife.com/cooking/whole-wheat-baking/

I also tried making my own fresh ground wheat soda crackers using a recipe from my Fanny Farmer Baking Book.  They are SO delicious!  By the way, if you're looking for a good grain mill, this is the one I use.

Ten-Day Whole Food Challenge
Then, a friend of mine challenged us to ten days of whole foods (read details HERE).  No problem, since this was already the direction  I was heading.  But I tell you what, cutting out my children's morning granola bar from a box has been a challenge.  I am not going to toss them all.  I will let them slowly eat them up (I have a ton because I buy in bulk, thank you Costco), but no more relying on them for breakfasts.  I also have to be certain to plan my meals carefully to keep from being tempted to eat out.  One thing I did was to bake a whole organic chicken Sunday at 200 degrees while we were at church, so by the time we got home it was fall off the bone delicious and only needed its skin crisped up.  I'll be sure to post that recipe for you too.  What was great about that one meal is that it also provided a casserole which fed us dinner Monday night and Wednesday, as well as a ton of chicken salad that I ate for lunch yesterday and today, and will be eating again tomorrow and possibly Thursday as well.

Don't you feel so resourceful when you do that, putting leftovers to good use?  I challenge you to do one big meal next week that provides food for several days.  You don't have to eat the same thing over and over, like a giant tray of lasagna (I can barely make it anymore because I used to to this and got so SICK of it).  But find a large main dish that can be reused in different ways, and incorporate it into at least two other meals for the week.

Yesterday was an especially busy "homesteading" day.  I had several homemade projects to complete.  I started with more homemade laundry detergent (been making my own since 2009).  I then made some homemade yogurt using some new freeze dried cultures and it turned out AMAZING.  Here are the cultures I tried (although I just found them cheaper at my Earth Fare grocery store, so check around locally).  I usually just use Danon All Natural (NOT the low fat, flavored, light or any other kind) yogurt to start my batch, so this was my first time with dried cultures.  I used one pack (5 g) to culture 54 oz of yogurt.  (I have determined this is the MOST I can possibly fit in my yogurt maker.  I squeeze two 16 ounce jars, two 8 ounce jars and a 6 ounce jar in there.)  Let me tell you, though, this was the creamiest, most delectable yogurt I have ever tasted.  I put a spoonful of jam and a drizzle of honey in it this morning, topped with a sprinkling of granola.  HEAVEN.

Okay, so back to my homesteading ways yesterday... My new tortilla press arrived from Amazon!!!  I had also ordered some (non-GMO) Bob's Red Mill masa harina and one of those handy (BPA-free) tortilla holder things.  I also mixed up a little jar of taco seasoning following this recipe (except I omitted the black pepper since I felt it was spicy enough for me without it).  My husband shot his first deer on his first hunting trip ever a few weeks ago, so we had some lovely organic venison fajitas last night with our fresh tortillas.  I took the extra tortillas and made some chips following this recipe.

Upcoming Projects
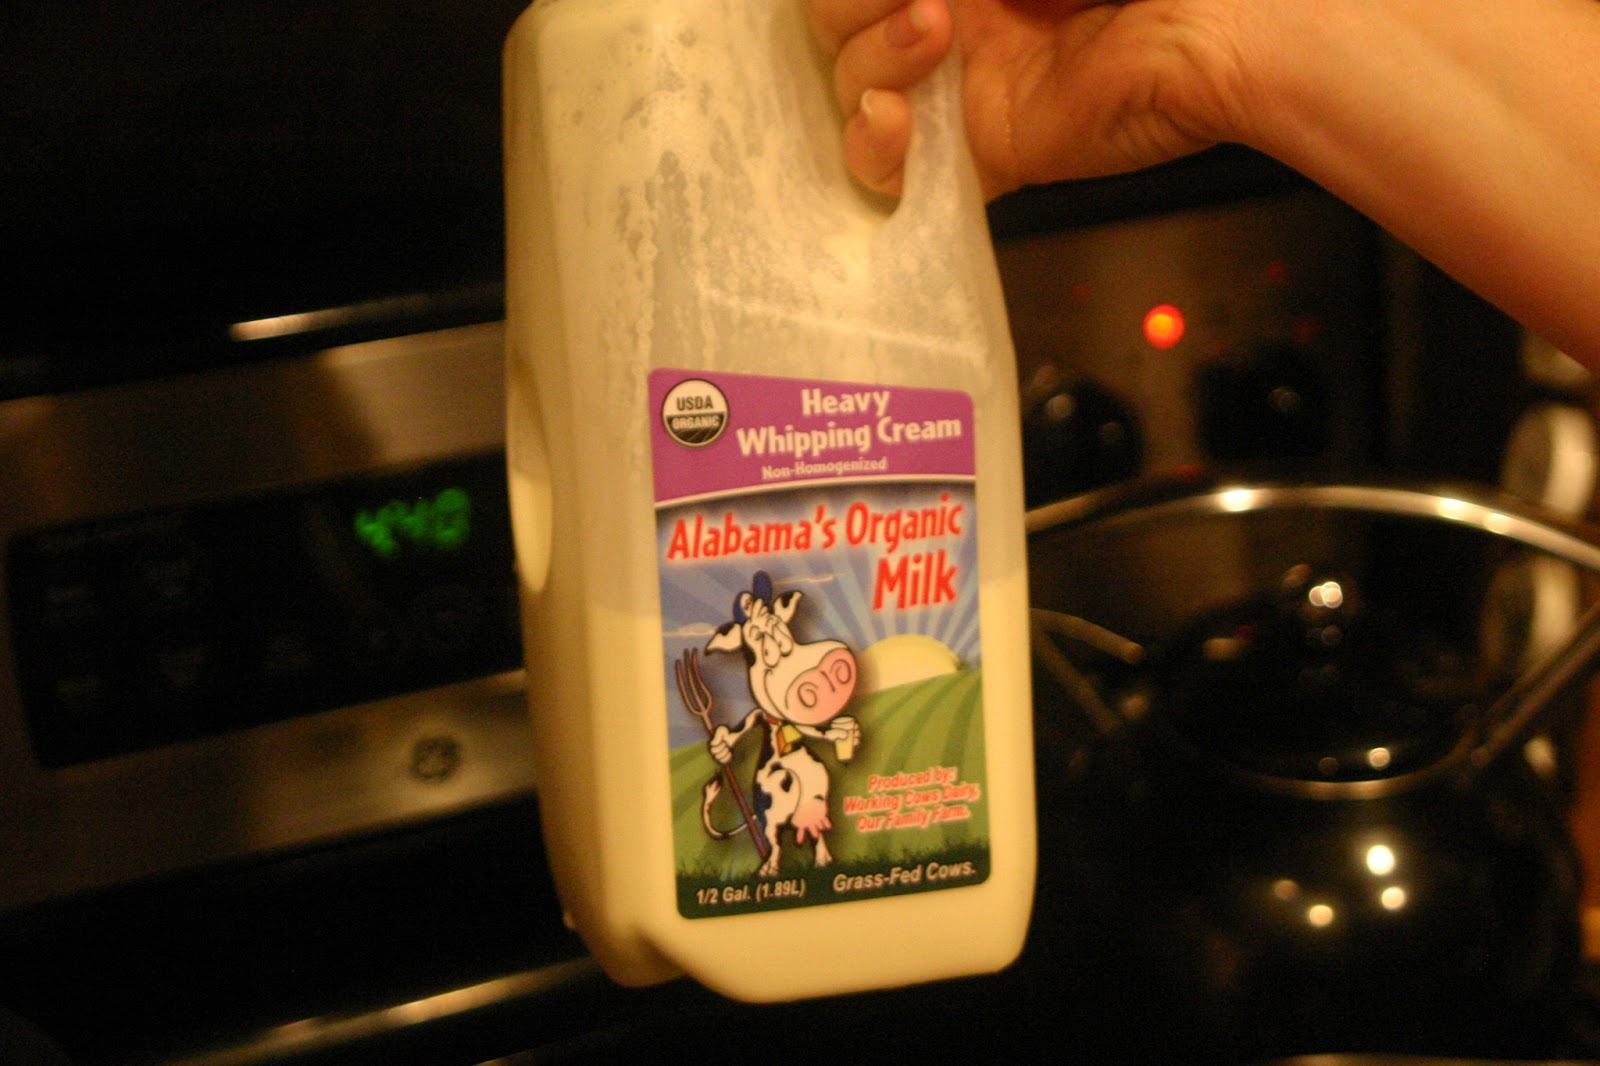
So that's what I've been up to the past couple weeks!  Let me tell you a little bit of what I would like to start working on in the upcoming weeks.  First of all, I was with my family in Earth Fare Saturday, stocking up on non-GMO items (organic whenever possible), and I was checking out their prices on organic milk.  I have shied away from the organic milk at Costco, where I usually buy regular milk for $3.00-3.15/gal.  Costco has their organic milk for a whopping $7.70/gal!!  No way I could justify spending that, but after reading about the dangers of GMOs and knowing that was in my baby's milk.....  So here I was at Earth Fare and I see THEIR organic milk is only $5/gal!  I was about to buy some when a kind young gentleman stocking a shelf asked if he could help.  I told him I was looking to switch to organic milk and he began to tell me about the milk he was stocking on the shelf above the store brand.  It was called Alabama's Organic Milk.  Hmm, local!  You don't understand, we don't live in dairy country down here, so I don't see local milk often.  Okay, ever.  I once bought some raw milk cash under the table from a farmer, but that's the only time we've ever had it and I was afraid to give it to the kids since it was not pasteurized.  Anyway, this milk is not only local, but this guy, Johnny, and his family run the farm and are the state's only certified organic dairy farm!  It costs $6.50/gal, but I decided it was worth it to support a local farmer who was doing things the RIGHT way, the organic way.  I encourage you to read about this farm here on their website.  If you don't live in Alabama or do not have a store that sells Alabama's Organic, I urge you to try to find a local or at least organic source for your milk, if there is any way you can make it work in your budget.

So what does this have to do with upcoming projects?  Well, wouldn't you know, Johnny and his family also sell their organic cream!  Only $10 per half gallon.  That isn't a bad price for heavy cream even compared to non-organic!  So what can I do with this lovely cream?  Make butter, mascarpone cheese, cream cheese, clotted cream, and any number of delightful dairy treats!  Stay tuned for these exciting (to me) endeavors.  : )

Monday, October 29, 2012

Homemade Applesauce

A few years ago I got bitten by the self-sufficient (a.k.a. suburban homesteading) bug and set out to make as many things from scratch as possible.  At the time I had a two-year-old and a newborn, so I decided I needed to focus on foods the entire family could enjoy (though the baby would have to wait a few months).  The foods I made from scratch needed to save me money and not require an exorbitant amount of time since I had two little ones to tend to.  I started researching how to make my own applesauce and found it to be delightfully simple.  I learned the most  from this website:

http://www.pickyourown.org/applesauce.htm

We recently moved to a new city so I was thrilled last week to find the wholesale farmer's market.  I got a few bags of discount produce at $2/bag.  Here's what I scored for only SIX dollars:


These apples are the best to use if you can find them because (1) it gives you an assortment of varieties which gives your sauce more flavor and (2) they're so CHEAP.  Here are the steps that I follow to make my applesauce:

1. Wash your apples.  These are Fuji, Red Delicious, and Gala. (There were some Granny Smith in the bags but I set those aside to go in my Dutch Apple Bread.)  I had about 10 lbs of apples in this batch.  The amount you use is up to you, but in my opinion it isn't worth the work if you aren't doing a decent size batch.

2. Add about two inches of water to the largest boiler/dutch oven you have.  Bring to a boil while you prepare the apples.
3. Slice your apples.  If you have one of these handy apple slicers, you can get the work done in no time.  You can cook the cores with the apples if you like because they'll be strained out later, but I find the seeds give the sauce a bitter taste.  If a few seeds get in, that's okay.
Chances are, if you got discount apples, there will be a few bruises among them.  If it's a small bruise, I leave it.  After all, they're about to get mashed up.  But if you have a bad spot, like on this apple, cut down into the apple and remove the entire area.
4. Add the apples to the boiling water, reduce to medium-low and cover.  Let simmer until all the apples are soft.  Stir a couple times during the cooking process to be sure they cook evenly.
Here are the apples once they have cooked down:
5. Now comes the fun part: straining the apples.  You have a several choices when it comes to tools.  I have used these two with equal success: a metal strainer with wood pestal (mine is slightly different than the one in the link) or the fruit and vegetable strainer attachment for your mixer.  The metal strainer is easier to clean up since it doesn't have so many pieces, but it requires a good deal more elbow grease.  I opted for the mixer attachment this time around:
Just place your apples in the top, being sure to squeeze out what water you can as you scoop them from the pot.
Push them through the tube.
Watch in wonder as your cooked apples are transformed into sauce and the skin, seeds, and tough pieces are strained out the side.
 The finished result!


You have a few options when it comes to storing your applesauce.  It can be canned in a water bath canner, although I have never tried canning my applesauce.  (For canning instructions, see the link above to the Pick Your Own website.)  I have always frozen it.  I picked up these handy quart-size freezer containers on clearance at the end of canning season one year.  Be sure to label so they don't get confused for something like chicken broth in your freezer. (Yep, I've made that mistake before.  Imagine my disappointment when I thawed the container in the fridge and went to dip out my delicious applesauce only to find out it was chicken broth.  Needless to say, we ended up making soup instead.)  It will keep for a couple weeks in the fridge or indefinitely in the freezer.  Canned, it will last 2-3 years in your pantry.

You can add cinnamon or pureed strawberries for other delicious varieties.  One thing I never add is sugar.  If you aren't using tart apples, there should be no need for it.  I like to store it plain and then add cinnamon or strawberries as I use it.  We love eating it plain as well.

My ten pounds of apples yielded just under three quarts of applesauce.  At $0.30/lb, that's 12 cups for $3.  Considering it's roughly $2/20 oz in the store, or approximately $10 for the three quarts we made, that's a savings of nearly $7.  Not bad!  And trust me, it tastes about 100 times better!