Wednesday, March 13, 2013

DIY Cannoli

When I found out how easy homemade mascarpone was, I knew I had to try my hand at cannoli.  I found a recipe on www.foodnetwork.com and adapted it.  Here is the link to the original recipe:

I am giving you step by step photo instructions here, but if you scroll to the end of the post, I have a printer-friendly version of the recipe.  Just highlight and click "print selection."

Preparation
Make (or buy) cannoli tubes.  You need metal or wooden tubes to fry your cannoli.  My husband cut the bottom out of a disposable casserole dish.  As you can see, we were able to make two tubes from the one pan.
 Take a broom handle and wrap the metal tightly around it.  Temporarily tape in place with masking tape.
Slip the tube off the handle (you may have to unscrew the end off the broom).  Staple each end of the tube, then remove the tape.  Voila, two complete cannoli tubes.  You can make as many as you like, though you will probably only be frying 2-4 at a time.


Shell Instructions
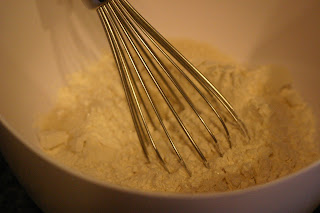
Step 1: Whisk together 2 cups all-purpose flour, 1 Tbsp granulated sugar, and 1/4 tsp salt.
Step 2: Cut 2 Tbsp unsalted butter into small pieces.  Using your fingers, work the butter into the flour mixture until it makes coarse crumbs.
 Step 3: Separate one egg.  Set the white aside and add the yolk to the flour mixture.
Add either 1/2 cup of dry white wine or 1/2 c water plus 1 Tbsp rice vinegar.  Mix until you have a smooth dough.
 Step 4: Wrap the dough with plastic wrap and flatten slightly. Refrigerate until you have finished the filling.


Filling Instructions
Step 1: Combine 12 oz mascarpone cheese (I used all that my homemade recipe yielded), 3/4 c powdered sugar, 1 tsp ground cinnamon, and 1/4 tsp allspice.
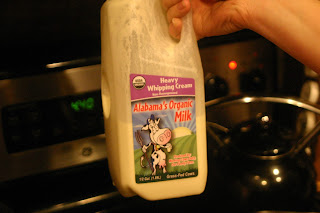
 Step 2: Beat 1/4 c heavy whipping cream until fairly stiff.
 Gently fold whipping cream into cheese mixture.
 Step 3: Zest one lemon.
 Add lemon zest to cheese mixture.
Step 4: Add 1/4 c mini semisweet chocolate chips to the cheese mixture.  Stir gently to combine.  Cover with plastic wrap and refrigerate until you have finished making the shells.

Frying the Shells
Step 1:  Heat one quart of oil (I used peanut oil) to 360 degrees F. (Watch the temperature so it doesn't become too hot.)
Roll half the dough on a lightly floured surface as thinly as possible.  It needs to be as close to paper thin as you can manage because it will puff up as it fries.  Use a circle jar, bowl, lid, etc. to cut your shells.  (As you can see, my husband bought a container of mascarpone to compare ours to because he wasn't convinced it was supposed to taste the way it does.  It did.  : )
Cut and reroll until you have all the circles cut out.  If you have someone helping you, you can do this while you have someone else frying the ones you have already finished.
Step 2: Make an egg wash using the white you saved earlier and about a tablespoon of water.  Take one of the circles and roll it out a little more.  (They tend to shrink up after you cut them, so you need to reroll to keep them very thin.)  Roll the circle around the tube.  Use your finger to rub some egg wash onto the part of the circle that will overlap.  Finish rolling and press to seal.  Flute the edges slightly to allow the oil to penetrate the tube.
Step 3: Place up to four tubes in the hot oil (as many as your skillet can handle).
Once the tubes have become golden brown, flip them over to cook the other side.  After it has finished cooking, carefully lift the tube from the oil using tongs.  Slip the shell off using a kitchen towel.  Let it drain on paper towels.
Finishing the Cannoli
Step 1: Fill a pastry bag (or large, sturdy ziplock bag) with the filling mixture.  Cut a large hole in the end of the bag.  Pipe the filling into the cannoli.  Only fill the cannoli you plan to eat immediately.  Save any leftover filling in the refrigerator.  Extra shells can be saved in a ziplock bag.  If you want to crisp up the leftover shells, you can stick them in the toaster oven for a little while, then let them cool before filling.
Step 2: Dust with powdered sugar and ENJOY!!!  This is probably the best dessert I have ever made.  No, this IS the best dessert I have ever made, hands down.

Printer-Friendly Recipe:

DIY Cannoli

Equipment
2-4 cannoli tubes or 1-2 foil casserole pans to make them (I buy mine in bulk for cheap)
Masking tape and staples (if making your own tubes)

Ingredients
Shells:
2 c all-purpose flour
1 Tbsp granulated sugar (use cane to ensure non-GMO)
1/4 tsp salt
2 Tbsp unsalted butter, cut into small pieces
1 egg separated (save white for later)
1/2 c dry white wine, or substitute water + 1 Tbsp rice vinegar (add the vinegar to your measuring cup first, then fill with water to reach 1/2 cup)

Filling:
12 oz mascarpone cheese
3/4 c powdered sugar
1 tsp ground cinnamon
1/4 tsp allspice
1/4 c heavy cream (use organic if possible to ensure non-GMO)
1/4 c mini semisweet chocolate chips
1 lemon
1 quart oil for frying (NOT canola or other GMO oils; I used peanut oil)
Flour, for rolling
Egg white (left over from separated egg used in shell)
Powdered sugar, for dusting

Shell Instructions
1. Whisk together 2 cups all-purpose flour, 1 Tbsp granulated sugar, and 1/4 tsp salt.2. Cut 2 Tbsp unsalted butter into small pieces.  Using your fingers, work the butter into the flour mixture until it makes coarse crumbs.
3. Separate one egg.  Set the white aside and add the yolk to the flour mixture. Add either 1/2 cup of dry white wine or 1/2 c water plus 1 Tbsp rice vinegar.  Mix until you have a smooth dough.
4. Wrap the dough with plastic wrap and flatten slightly. Refrigerate until you have finished the filling.

Filling Instructions
1. Combine 12 oz mascarpone cheese (I used all that my homemade recipe yielded), 3/4 c powdered sugar, 1 tsp ground cinnamon, and 1/4 tsp allspice.
2. Beat 1/4 c heavy whipping cream until fairly stiff. Gently fold whipping cream into cheese mixture.
3.  Zest one lemon. Add lemon zest to cheese mixture.
4.  Add 1/4 c mini semisweet chocolate chips to the cheese mixture.  Stir gently to combine.  Cover with plastic wrap and refrigerate until you have finished making the shells.

Frying the Shells
1. Heat one quart of oil (I used peanut oil) to 360 degrees F. (Watch the temperature so it doesn't become too hot.)  Roll half the dough on a lightly floured surface as thinly as possible.  It needs to be as close to paper thin as you can manage because it will puff up as it fries.  Use a circle jar, bowl, lid, etc. to cut your shells. Cut and reroll until you have all the circles cut out.  If you have someone helping you, you can do this while you have someone else frying the ones you have already finished.
2.  Make an egg wash using the white you saved earlier and about a tablespoon of water.  Take one of the circles and roll it out a little more.  (They tend to shrink up after you cut them, so you need to reroll to keep them very thin.)  Roll the circle around the tube.  Use your finger to rub some egg wash onto the part of the circle that will overlap.  Finish rolling and press to seal.  Flute the edges slightly to allow the oil to penetrate the tube.
3.  Place up to four tubes in the hot oil (as many as your skillet can handle). Once the tubes have become golden brown, flip them over to cook the other side.  After it has finished cooking, carefully lift the tube from the oil using tongs.  Slip the shell off using a kitchen towel.  Let it drain on paper towels.

Finishing the Cannoli
1. Fill a pastry bag (or large, sturdy ziplock bag) with the filling mixture.  Cut a large hole in the end of the bag.  Pipe the filling into the cannoli.  Only fill the cannoli you plan to eat immediately.  Save any leftover filling in the refrigerator.  Extra shells can be saved in a ziplock bag.  If you want to crisp up the leftover shells, you can stick them in the toaster oven for a little while, then let them cool before filling.
2.  Dust with powdered sugar and ENJOY!!!

Saturday, March 2, 2013

DIY Miracle Diaper Rash Cream

When one of my babies got a bad rash from an upset stomach, my doctor and mother both recommended this remedy.  It works WONDERS!  It's the only thing I use for diaper rashes caused by upset stomachs.

 Ingredients: Maalox and A&D ointment. As you can see, I use the generics.

Instructions: Squeeze a good bit of A&D (I used about 3-4 Tbsp) into a small bowl with high sides and pour  about a tablespoon of Maalox in.  Using a knife or hand mixer, mix as well as possible.  It will separate, but you just mix it a little as you use it.  I keep mine in a very small resealable container in the changing table.  Apply liberally to the affected area and say GOODBYE to painful diaper rashes.

Friday, March 1, 2013

DIY Mascarpone Cheese: SUPER EASY!


If you're like me and love to make things yourself, you have probably at least CONSIDERED making your own cheese.  But to be honest, until now, I've been very nervous because I thought it must be too difficult, require too many ingredients and pieces of equipment that I don't have...  But it turns out there are some very easy dairy products you can make yourself with ingredients and equipment you already have in your kitchen!  This is my first time making my own cheese, so I started with something super simple: mascarpone.  Not familiar with  it?  Have you ever had cannoli or tiramisu?  This is the cheese you use to make them.  You can also use it in place of cream cheese to make cheesecake.

Let me show you the three easy steps to making your own mascarpone...

Step 1: Pour four cups (one quart) of whipping cream into the top of a double boiler.  Don't have a double boiler?  Find a large bowl (glass or metal) to sit over a pot of boiling water.

 
 Heat the cream to 190 degrees F.  Use a candy thermometer to check the temperature.

Step 2: Remove double boiler/bowl from pot and whisk in two tablespoons of lemon juice. Stir constantly for 30 seconds, then continue to stir occasionally for the next five minutes.  The cream should be starting to thicken.

Step 3: Fold a piece of cheesecloth in quarters and lay it in a strainer over a bowl.  Pour the cream into the cloth.  You can let it drain like this, or hang it like this:


 Once most of the whey has separated (can take 1-3 hours), you have finished mascarpone cheese!


Now you're ready to make any number of Italian desserts.  Mmmm....  You can also eat it on toast or a bagel.  It's basically a lightly sweet cream cheese.  Save your whey to add to smoothies or other recipes for added protein.

Cost comparison:
I used fresh, local organic whipping cream, which cost me $10 for 1/2 gallon.  That's basically the same price as regular whipping cream in the grocery store.  Half of that is $5.  The lemon juice was so little it was basically free, unless you use a fresh lemon, then I guess it could cost up to $0.30.

Homemade mascarpone: $5.30 for about 13 ounces of cheese, or $0.41/ounce
Storebought mascarpone: $4.39 (Publix) for 8 ounces, or $0.55/ounce

So not only is this cheaper to make yourself, it is fresh, local and organic!  There is no comparison.

Printable Recipe (Just highlight and click "print selection" in the printer menu.)

DIY Mascarpone Cheese
Ingredients:
4 cups (one quart) heavy whipping cream
2 Tbsp lemon juice

Equipment:
Double boiler or bowl and pot
Candy thermometer
Cheesecloth or butter muslin

1. Pour four cups (one quart) of whipping cream into the top of a double boiler.  Don't have a double boiler?  Find a large bowl (glass or metal) to sit over a pot of boiling water.  Heat the cream to 190 degrees F.  Use a candy thermometer to check the temperature.

2.  Remove double boiler/bowl from pot and whisk in two tablespoons of lemon juice. Stir constantly for 30 seconds, then continue to stir occasionally for the next five minutes.  The cream should be starting to thicken.

3.  Fold a piece of cheesecloth in quarters and lay it in a strainer over a bowl.  Pour the cream into the cloth.  You can let it drain like this, or hang it over a bowl.  Once most of the whey has separated (can take 1-3 hours), you have finished mascarpone cheese!

Wednesday, February 27, 2013

DIY Egg McMuffins

 Ahh, Egg McMuffins.  I like how they aren't as greasy as biscuits or croissants, so I am often tempted to get one.  Until now.  These DIY Egg McMuffins are so much healthier and fresher, and even better, CONVENIENT!  You don't even have to get in your car.  With make ahead eggs, you can't beat them.

Step 1: Grease a muffin tin and crack the desired number of eggs in each cup.  If you don't like eating a whole yolk, break it up a little with a fork.  Season with salt and pepper (and anything else you like - herbs, etc.).

Step 2: Bake eggs at 350 degrees for 15-20 minutes, according to how done you like your yolks.  I did mine for 18 minutes and the yolks were very much done.  I think next time I will do them a little less.  The eggs slide right out of the pan.

Easy peasy, right?

Step 3: Assemble your muffin.  I use whole wheat muffins, split in half and put one egg on each.  That way I get twice the protein with only one muffin for carbs. You can add cheese, meat, whatever you like.  Toast on foil so the cheese doesn't melt down into your toaster oven.

Enjoy!!

What to do with those leftover eggs?  I keep mine in the fridge for quick breakfasts on the go, or you could even freeze them.  Just thaw in the fridge the night before.  If you like, you could even assemble the entire breakfast sandwich and freeze individually.  My kids love the eggs because they love boiled eggs and these taste just like them.  We also love them on salads.  The possibilities are endless.

Nutrition Comparison:
Egg McMuffin (no meat) vs DIY Egg McMuffin (one egg on whole wheat English Muffin with 0.3 oz cheddar cheese):
Calories: 280 vs. 224
Calories from Fat: 108 (39%) vs. 79.2 (35%)
Total Fat: 12 g (Sat Fat: 4.5 g) vs. 8.8 g (Sat Fat: 3.8 g)
Cholesterol: 225 mg vs. 219.9 mg
Sodium: 640 mg vs. 342.7 mg
Total Carbohydrate: 29 g (Dietary Fiber: 2 g) vs. 23.7 g (Dietary Fiber: 3 g)

Cost Comparison:
Egg McMuffin (no meat): $2
DIY Egg McMuffin (no meat): $0.75
     *Muffin: $0.50 (buy them on sale and get them for $0.25!)
     *Egg: $0.17 (organic free range would be $0.29)
     *Cheese: $0.08

Monday, February 25, 2013

100+ Recipes Using Cooked Chicken

I have started roasting a chicken about once a week, which has been a blessing and a challenge.  The blessing has come in that I have my meat already prepared for several meals.  The challenge has come in finding new ways to use that cooked chicken throughout the week.  I'm not someone who can handle eating the same things every week, or even every couple weeks.  I crave variety and LOVE trying new recipes.  That is why I have compiled this list, as much to help myself as to help anyone else out there with the same problem.

So I present to you 100+ Recipes Using Cooked Chicken.  Think of the list this way: I have basically completed your meal plan for the next year or so.  You simply roast or otherwise prepare a whole chicken on Sunday, then use the leftover meat in two of the following recipes later in the week.  And there you have it, about 1/3 of your weekly meals!  Please comment with your favorite uses for leftover chicken!

*Note: Any recipes that call for "cream of _____" I substitute my own using this recipe.  I make a huge batch, then freeze in zip lock bags that are weighed using my kitchen scale to 10.75 oz so they will be the equivalent of one can. Lay them flat when freezing and they will stack nicely.  You can also freeze in containers.

BBQ Chicken & Coleslaw Potato Skins
Appetizers:
BBQ Chicken and Coleslaw Potato Skins (CHOW)
Salsa Verde and Chicken Jalapeno Poppers (CHOW)
Chicken, Guacamole and Bean Nachos (CHOW)


Chicken Escarole Soup
Soups:
Chicken-Escarole Soup (Cooking Light)
Roasted Vegetable-Rosemary Chicken Soup (Cooking Light) *Just substitute cooked chicken.
Chicken Barley Soup with Walnut Pesto (Cooking Light)
Chicken and Wild Rice Soup (Cooking Light) *Substitute real cheese for the processed cheese.
Chicken Pasta Soup (Cooking Light) *Just substitute cooked chicken.
Chicken Orzo Soup (Cooking Light)
Coconut Curry Chicken Soup (Cooking Light)
Chicken Chili with Pesto (Cooking Light) *Just substitute cooked chicken.
Greek Lemon Soup
Chicken Chowder with Chipotle (Cooking Light) *Just substitute cooked chicken.
Chicken Corn Chowder (Cooking Light) 
Sausage and Chicken Gumbo (Cooking Light)
Broccoli and Chicken Noodle Soup (Cooking Light)
Ozoni (Japanese) Soup (CHOW)
Quick Chicken Noodle Bowls (Southern Living) *Just substitute cooked chicken
Chicken Soup with Latin Flavors (Good Housekeeping)
Chicken Noodle Soup (Redbook)
Tortilla Soup (Martha Stewart) *Just substitute cooked chicken.
Braised Chicken Gumbo (Eating Well)
Quick and Easy Chicken Noodle Soup (All Recipes)
Greek Lemon Soup with Chicken (Real Simple)
Chicken and Tortellini Soup (Real Simple)

Chicken Farfalle Walnut Pesto Salad
Salads:
Potato, Chicken and Fresh Pea Salad (Cooking Light)
Roast Chicken Salad with Peaches, Goat Cheese and Pecans (Cooking Light)
Chicken and Farfalle Salad with Walnut Pesto (Cooking Light)
Arugula Salad with Chicken and Apricots (Cooking Light) *Just substitute cooked chicken.
Pan-Roasted Chicken, Squash and Chard Salad with Bacon Vinaigrette (Cooking Light) *This also makes use of your drippings and reserved fat.
Asian Style Chicken Salad (CHOW)
Chicken Taco Salad (CHOW)
Apricot Arugula Chicken Salad
Rotisserie Chicken Salad (Good Housekeeping)
Minty Pesto Pasta Salad (Quick & Simple)
Warm Chicken Salad with Mustard Thyme Vinaigrette (Good Housekeeping)
Chopped Greek Salad with Chicken (Eating Well)
Chicken, Charred Tomato and Broccoli Salad (Eating Well)
Cobb Salad (Eating Well)
Asian Chicken Salad (Eating Well)
Curried Chicken and Pasta Salad (Eating Well)
Warm Winter Salad (Eating Well)
Chicken and Fruit Salad (Eating Well)
Chicken and White Bean Salad (Eating Well)
Holiday Chicken Salad (All Recipes)
Sesame Pasta Chicken Salad
Cha Cha's White Chicken Salad (All Recipes)
Sesame Pasta Chicken Salad (All Recipes)
Chicken Nicoise Salad (Real Simple)
Chicken and Wild Rice Salad (Southern Living)


Sandwiches/Tacos:
Little Italy Chicken Pitas
Chicken Mushroom and Gruyere Quesadillas (Cooking Light)
Roast Chicken Chimichangas (Cooking Light)
Chicken and Bacon Rollups (Cooking Light)
Mediterranean Chicken Salad Pitas (Cooking Light)
Little Italy Chicken Pitas with Sun Dried Tomato Vinaigrette (Cooking Light)
Rosemary Chicken Salad Sandwiches (Cooking Light)
Chicken and Roquefort Sandwiches (Cooking Light) *Just substitute cooked chicken.
Chicken Soft Tacos with Sauteed Onions and Apples (Cooking Light)
Cherry Almond Chicken Salad Sandwiches (CHOW)
Basic Chicken Quesadillas (CHOW)
BBQ Chicken Sandwiches (Eating Well)
Cherry Almond Chicken Salad
Chicken Salad Wraps (Eating Well)
BBQ Chicken Tacos (Good Housekeeping)
Lime Chicken Soft Tacos (All Recipes)
Chicken and Quinoa Burritos (Real Simple)
Chicken and Gruyere Turnovers (Real Simple)
Buffalo Chicken Sandwiches (Real Simple)


Main Dishes:
Spicy Asian Noodles with Chicken
Chicken Tetrazzini (Cooking Light)
Hot Chicken and Chips Retro (Cooking Light)
Biscuit Topped Chicken Pot Pie (Cooking Light)
Phyllo Chicken Pot Pie (Cooking Light)
Chicken and Broccoli Casserole (Cooking Light) *Just substitute cooked chicken.
Cheesy Chicken Enchiladas (Cooking Light)
Chicken Tamale Casserole (Cooking Light)
Black Bean and Chicken Chilaquiles (Cooking Light)
Three Cheese Chicken Penne Florentine (Cooking Light)
Chicken and Root Vegetable Pot Pie (Cooking Light)
Herbed Chicken and Dumplings (Cooking Light) *Just substitute cooked chicken.
Chicken Tetrazzini
Spicy Asian Noodles with Chicken (Cooking Light)
Jambalaya (Cooking Light) *Just substitute cooked chicken.
Chicken and Feta Tabbouleh (Cooking Light)
Creamed Chicken Pot Pie (CHOW)
Chilaquiles (CHOW)
Neo-Enchiladas Suizas (CHOW)
Chicken with Lemony Egg Noodles and Peas (Eating Well)
Quick Cassoulet (Eating Well)
Peanut Noodles with Shredded Chicken and Vegetables (Eating Well)
Cheesy Chicken Pasta (Eating Well)
Chicken Enchiladas (All Recipes)
White Cheese Chicken Lasagna (All Recipes)
Swiss Chicken Casserole (All Recipes)
Oven Chicken Risotto
Salsa Chicken Rice Casserole (All Recipes)
Broccoli Chicken Divan (All Recipes)
Cajun Chicken and Rice (Real Simple)
Gingery Peanut Noodles with Chicken (Real Simple)
Chicken Tetrazzini with Prosciutto and Peas (Southern Living)
Oven Chicken Risotto (Southern Living)
Baked Chicken Chimichangas (Southern Living)
Chicken Cobbler Casserole (Southern Living)
Chicken and Bowtie Pasta (Southern Living)
Light King Ranch Chicken Casserole (Southern Living)

Pizzas:
Cuban Chicken Pizza (Cooking Light)
Ratatouille Pizza with Chicken (Cooking Light)
BBQ Chicken Pizza (Cooking Light)
Buffalo Style Chicken Pizza (All Recipes)
Chicken, Pesto and Fried Egg Pizza (Real Simple)


BON APPETIT! (for the next year or so...)

Saturday, February 23, 2013

Free Movies That Will Change Your Life

Let me tell you a story... A true story.

One winter's night about three years ago, I was watching a show on the History Channel that explains how we get the foods we eat. That night they were talking about eggs. Being a city girl and knowing nothing of agriculture, I was entirely unfamiliar with the industrial process of chicken farming. I have to tell you, what unfolded before my eyes in those thirty minutes broke my heart. Those sweet baby chicks are hatched on giant conveyor belts, alongside countless thousands of other chicks. Then they are dumped into another area where a worker hangs them up BY THEIR BEAKS on this machine that cuts the end of it off!! Then they go on through there, pushed and shoved through the rest of the assembly line as they are injected and dumped into crates.


Then these poor babies are raised in nasty dark barns, stepping on top of one another, trying to get to food and water, until they finally grow big enough to lay eggs. At this point they are put in cages, barely big enough for their bodies, where they eat, drink, poop and lay eggs until they die. : ( Seriously.

 
And no, this was not a propaganda film, where you might be tempted to think they were exaggerating the conditions. If you buy regular eggs from the grocery store (and I'm not judging you because I did too), I swear to you, that is exactly where your eggs come from. With tears in my eyes, I turned to my husband and told him, "One day, when we have land, I would love to have a few chickens to lay eggs."

Uh oh.

Apparently those were the exact words my country boy turned doctor husband had been dying to hear. "We don't need to wait til we have land! We can get some right now!" I looked at him like he had just grown two heads. What on earth could he be thinking??? He was a resident at the time and we lived in a tiny house on a postage stamp yard. We literally had no backyard, just a six foot wide deck that bordered a fence and parking lot. However, we did have a side yard. Down one side of our house was a strip of grass about ten feet wide. We had planned on putting a few beds in to start a vegetable garden and I had no idea where he was going to squeeze chickens in.

Well guess what. He found a space. Right outside of my breakfast nook window went up a salvaged chicken coop, and he built a caged run to go alongside it. It was just big enough to house three chickens. The following spring, we bought three young hens (Sissy, Missy, and Chrissy, named by our darling two year old) and by June 2010, we were in the egg business. Oh boy, I had never eaten eggs like that in my LIFE!! We also began vegetable gardening and learned to put the chicken manure to good use. We had phenomenal gardening success after that, and even had one single cherry tomato plant that grew over 7 feet tall and yielded over 1000 tomatoes!!! That's right, our little postage stamp side yard was producing 2-3 eggs a day, tomatoes, beans, peppers, peas, squash, cucumbers, watermelon, strawberries, pineapple, and corn (IN THE SAME SEASON)!

Sissy, Missy and Chrissy (left to right), about 8 weeks old here.

While that chicken show initially prompted us to start reevaluating our food source, it was just the beginning. We had just signed up for a trial of Netflix and discovered the documentary "Super Size Me" was available for free! After watching it, we also found one for free on Amazon Prime called, "Food, Inc." Wow, if you haven't watched those two movies, I am begging you to do so. If you have Amazon Prime, they are still available for free. I have included direct links below, or you can find them by searching on Amazon. Two other great free documentaries available on Amazon Prime are "King Corn" and "Fresh." Watching these films opened my eyes to what we are truly consuming when we eat our food. You might think you don't eat much processed food so you're okay. Ooh, buddy, that's what I thought until I found out about the cattle feed lots, the chicken farms, pig farms...


If you watch even one of these movies, it will change your mindset forever. Don't let that scare you, though. Change can be a good thing. It's funny how my forward progress in health has brought me BACK to the way things USED to be done. : )

As promised, here are the links to some fabulous free food documentaries.  Don't have Amazon Prime?  You can get a trial and then cancel it without being charged (be sure to read up on that and do it correctly if you don't wish to keep it), or just pay a few dollars to rent them.  They might even be available in a Redbox near you.  Check 'em out...

Food Inc: http://www.amazon.com/Food-Inc/dp/B002VRZEYM/ref=sr_1_1?s=instant-video&ie=UTF8&qid=1361685441&sr=1-1&keywords=food+inc.

King Corn: http://www.amazon.com/King-Corn/dp/B003F9XQ9A/ref=sr_1_1?s=instant-video&ie=UTF8&qid=1361685985&sr=1-1&keywords=king+corn

Fresh: http://www.amazon.com/Fresh/dp/B007JRU4TY/ref=sr_1_1?s=instant-video&ie=UTF8&qid=1361686043&sr=1-1&keywords=fresh

(I do not have Netflix any longer, so I cannot provide you a link to "Super Size Me", but if you have Netflix, try searching it.  It is also available for rent on Amazon for $3.99.)